

Palisade Fence Core Advantages
1. High Anti-Climb & Anti-Vandal
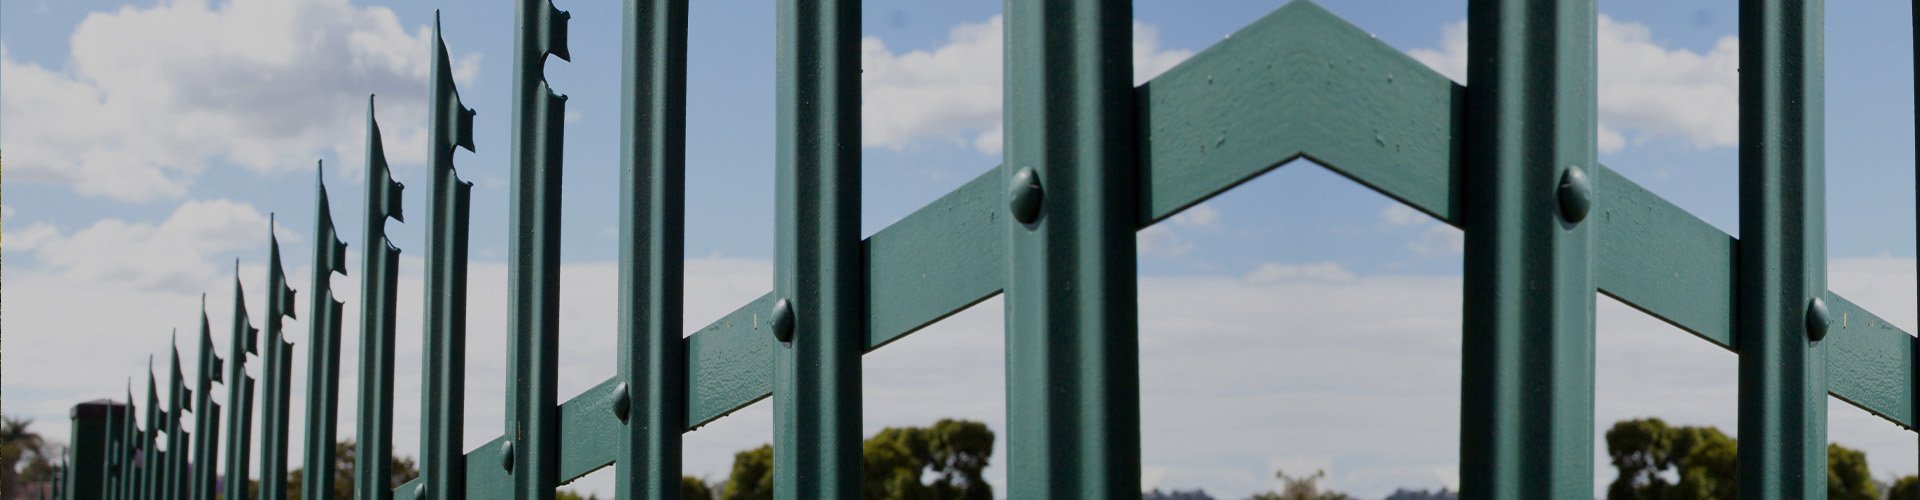
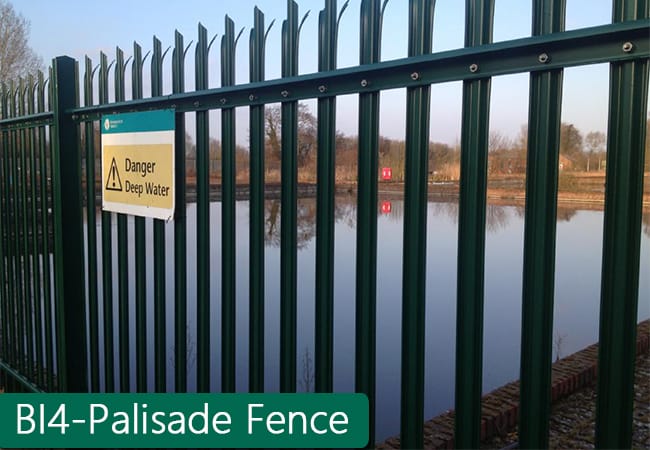
Sharpened rigid pales prevent climbing. Heavy‑gauge steel resists cutting and impact.
2. Strong & Rigid Structure
Welded pale assembly + angle iron frame – no deformation under pressure.
3. All-Weather Corrosion Protection
Hot-dip galvanized + PVC coated – withstands industrial, coastal and harsh outdoor environments.
4. Fast Modular Installation
Pre‑assembled panels + bolt‑on posts – no on‑site welding. Save time and labor.
Product Details– BDFENCE
Pale & Angle Iron Specifications
| Component | Thickness (mm) | Width (mm) | Material / Notes |
|---|---|---|---|
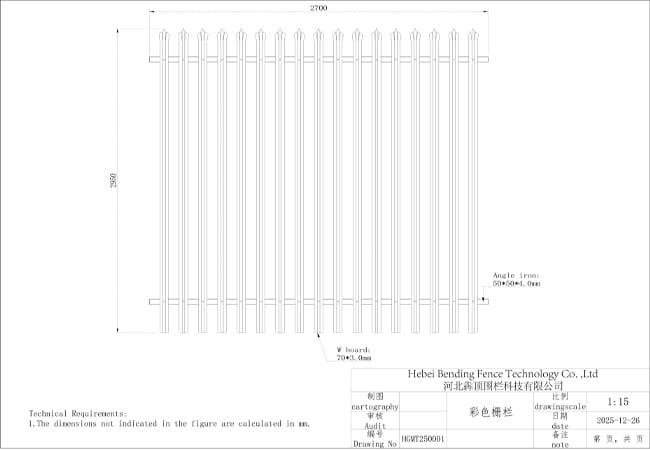
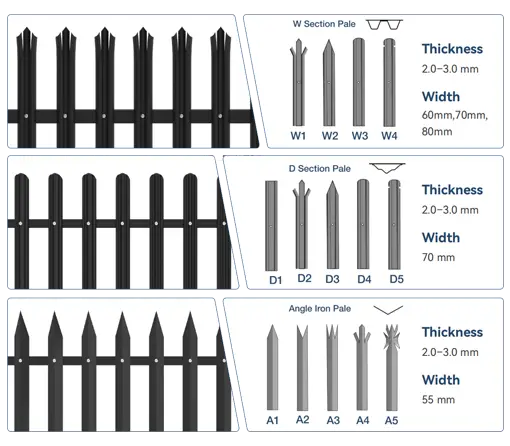
| W Pale | 2.0 – 3.0 | 60 / 70 / 80 | W‑profile (wave shape for extra rigidity), galvanized steel |
| D Pale | 2.0 – 3.0 | 70 | D‑profile (smooth face, sharp edges), galvanized steel |
| Angle Iron | 2.0 – 3.0 | 55 | Hot‑dip galvanized angle steel, used for horizontal rails |
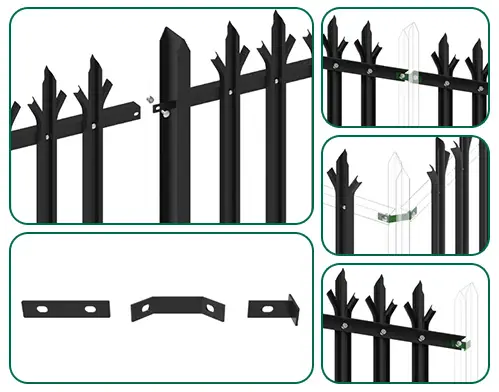
H Beam Post + Angle Iron Rail + Connection Clip
| Parameter | Recommended Specification |
|---|---|
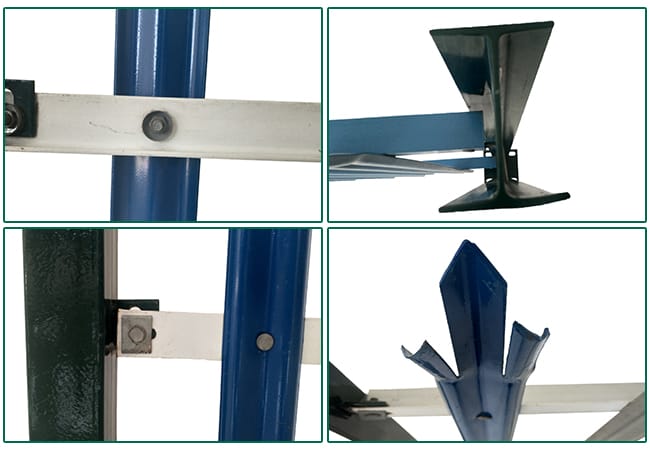
| Post | H Beam 55 × 100 × 5 mm |
| Rail | Angle Iron: 40 × 40 × 4 mm, 50 × 50 × 5 mm |
| Accessory | Connection Clip + Bolts & Nuts |
| Pale Quantity | 17 pcs |
| Pale Distance | 90 mm |
| Panel Width | 2.75 m |
| Panel Height | 1.8-3 m |
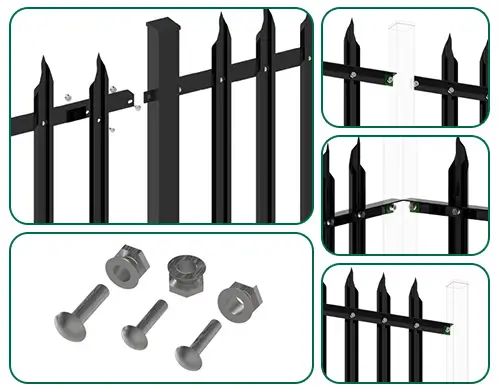
Square Post + Angle Iron Rail + Welded Lug
| Parameter | Recommended Specification |
|---|---|
| Post | Square Post 60 × 60 mm, 80 × 80 mm |
| Rail | Angle Iron: 40 × 40 × 4 mm, 50 × 50 × 5 mm |
| Accessory | Bolts & Nuts |
| Pale Quantity | 17 pcs |
| Pale Distance | 90 mm |
| Panel Width | 2.75 m |
| Panel Height | 1.8-3 m |
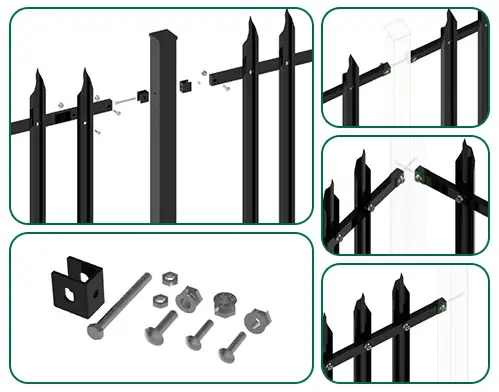
Square Post + Rectangular Tube Rail + Bracket
| Parameter | Recommended Specification |
|---|---|
| Post | Square Post 60 × 60 mm, 80 × 80 mm |
| Rail | Rectangular Tube: 20 × 40 mm |
| Accessory | Bracket, Bolts & Nuts |
| Pale Quantity | 17 pcs |
| Pale Distance | 90 mm |
| Panel Width | 2.75 m |
| Panel Height | 1.8-3 m |
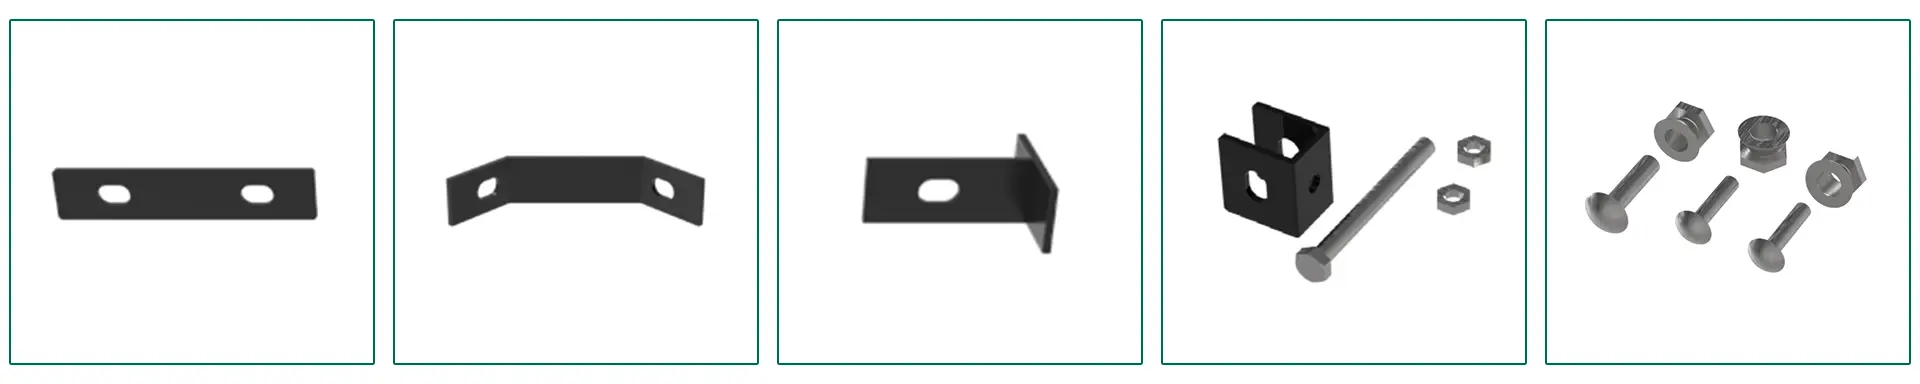
Special Accessories
Applications of Palisade Fence
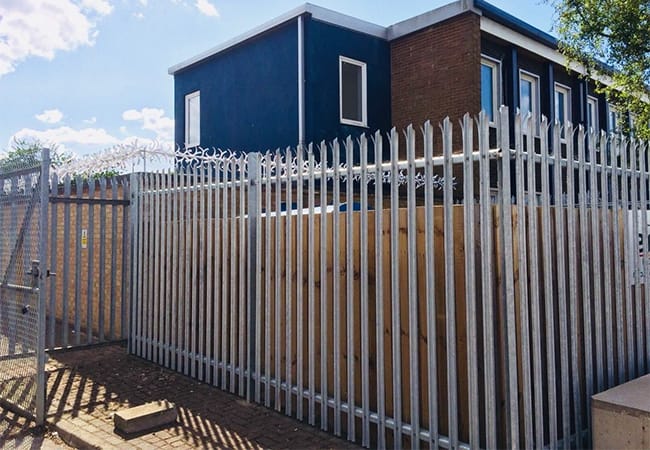
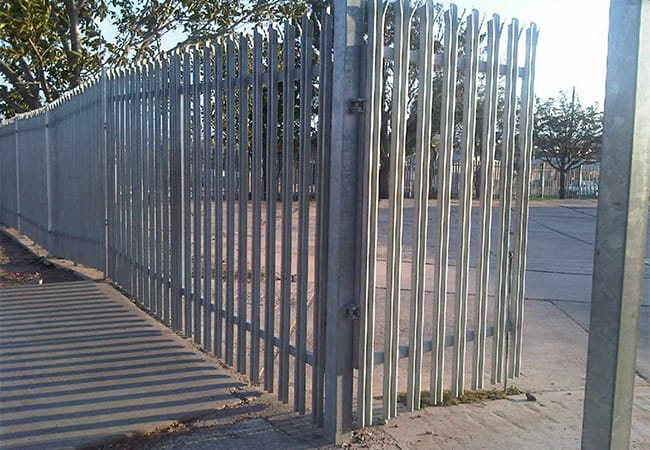
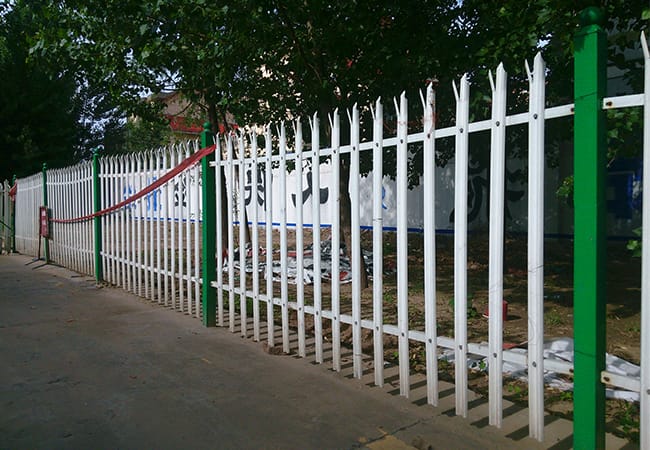
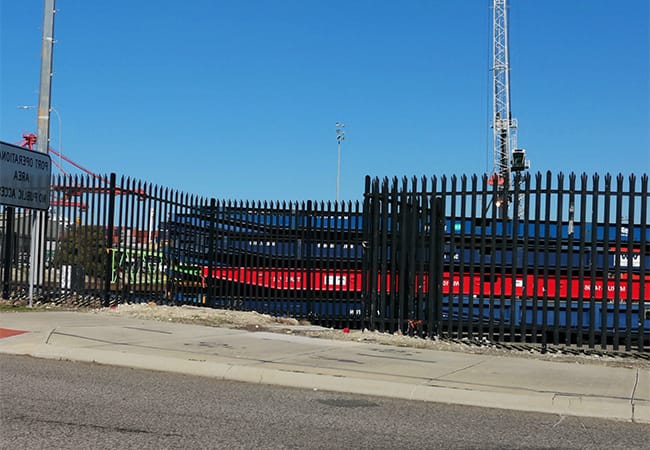
Detailed Installation Process for Gabion Wall
The installation of gabion wall requires strict adherence to operational standards and detailed steps to ensure the overall stability, safety and aesthetic appearance of the wall. Below is the expanded and detailed installation process, with in-depth explanations of each step, key points and precautions:
1. Site Preparation & Foundation Leveling
Before starting the installation, thorough site preparation is the foundation to ensure the smooth progress of subsequent operations. First, clear the entire construction area, remove all obstacles such as stones, weeds, garbage and sundries that may affect the installation, and clean the ground to avoid interference with positioning and assembly. Then, use a level to check the flatness of the installation ground; if there are local uneven areas, level them with compacted gravel or sand to ensure that the gabion baskets can be placed stably and evenly. Next, according to the design drawings and actual installation requirements, use professional measuring tools (such as tape measure, theodolite and ink line) to mark the layout range and stacking position of each gabion basket. The foundation should be compacted with a compactor to achieve sufficient bearing capacity, and a layer of gravel cushion can be laid to improve drainage and stability. At the same time, mark the alignment lines to ensure the straightness and verticality of the entire gabion wall structure.
2. Gabion Basket Placement & Assembly
Gabion basket placement and assembly are core links affecting the overall stability of the gabion wall, and every detail needs to be strictly controlled. First, unfold the folded gabion baskets on the leveled foundation and check for any damage or deformation; ensure all mesh panels and connecting wires are intact. Then, assemble the baskets into a rigid box structure: erect the side panels and secure them with the provided spiral connectors or binding wires at all joints, ensuring tight and firm connections. Align the baskets accurately along the marked lines, and connect adjacent baskets transversely and longitudinally to form an integrated unit. For multi-layer construction, place the upper-layer baskets with a proper overlap or step pattern to enhance structural stability and load-bearing performance. Check the squareness and alignment of each basket to avoid skewing during filling.
3. Stone Filling & Compaction
After the gabion baskets are fully assembled and fixed, stone filling can be carried out. First, select durable, non-porous, and weather-resistant natural stones (such as granite, basalt) with appropriate particle size matching the basket mesh. During filling, place larger stones at the outer sides and corners to maintain a neat appearance, and fill smaller stones in the internal gaps to ensure compactness. Fill the stones evenly layer by layer, and manually compact the filling to eliminate voids; avoid overfilling to prevent basket deformation. For taller walls, fill the baskets in sections to maintain structural balance. Ensure the stone surface is flat and the basket mesh is not distorted, which guarantees the wall’s stability and aesthetic effect.
4. Lid Closing & Tightening
Lid closing and tightening directly affect the structural integrity and service life of the gabion wall. First, after stone filling is completed, cover the top of the gabion basket with the pre-attached lid panel. Use heavy-duty binding wires or spiral connectors to securely fasten the lid to the side frames at intervals of 20–25 cm, ensuring all connections are tight and firm. Connect the lids of adjacent baskets together to enhance overall integration. Pay special attention to tightening the corners and edges to prevent stone spillage or mesh loosening. Double-check all connection points to ensure no gaps or loose wires, which provides reliable protection for long-term use.
5. Alignment & Stability Check
After the installation and filling of gabion baskets are completed, a comprehensive alignment and stability check is required to ensure that the installation quality meets the standards. First, use a level and plumb line to check the verticality of the wall and the levelness of each layer: verticality error should not exceed 5mm per meter, and horizontal alignment should be consistent with the design. Then, check the overall straightness and structural stability: gently push the wall to ensure no obvious shaking or displacement. Check the tightness of all wire connections and the compactness of stone filling. If any problems are found (such as skewing, loose connections, uneven filling), adjust and reinforce them immediately to ensure structural safety and durability.
6. Site Cleaning & Final Acceptance
The final step of the installation process is site cleaning and acceptance, which ensures the aesthetic appearance of the wall and confirms that the installation is up to standard. First, remove excess stones, debris, and wire scraps from the construction site, and clean the surface of the gabion wall to maintain a neat appearance. Then, carry out comprehensive acceptance according to the design drawings and installation standards: check the wall dimensions, alignment, verticality, filling compactness, and connection firmness; check for mesh damage, rust, or loose components; verify drainage performance and structural stability. After the acceptance is qualified, the installation work is officially completed. If unqualified items are found, they should be rectified immediately until they meet the acceptance standards.
Note
During the entire installation process, construction personnel should wear protective equipment (such as safety helmets, gloves and safety shoes) to ensure construction safety. In addition, pay attention to the protection of the gabion mesh surface during installation to avoid damage to the surface treatment layer (such as galvanizing, PVC coating) which may affect the corrosion resistance and service life of the wall.
Why Choose BDFENCE for Palisade Fence?
1. Heavy‑Duty Steel & Dual Coating
We use Q235 galvanized steel with hot‑dip galvanizing + optional PVC/powder coating. Rust‑proof, vandal‑resistant – 25+ years service life.
2. Full Customization – Pale Type, Thickness & Width
W pale (60/70/80mm) or D pale (70mm), thickness 2.0‑3.0mm. Angle iron rails (55mm). Panel height 1.2‑3.0m, width 2.0‑2.5m. Square posts 60/80/100mm – tailor for industrial parks, power stations, airports.
3. High Anti‑Climb Performance
Sharpened pale tips and narrow gaps prevent climbing. Rigid welded structure resists bending, cutting, and vehicle impact.
4. Fast, Welding‑Free Installation
Pre‑welded panels + bolt‑on brackets – no on‑site welding. Save 40% labor.
5. Factory Direct – Quality & Price
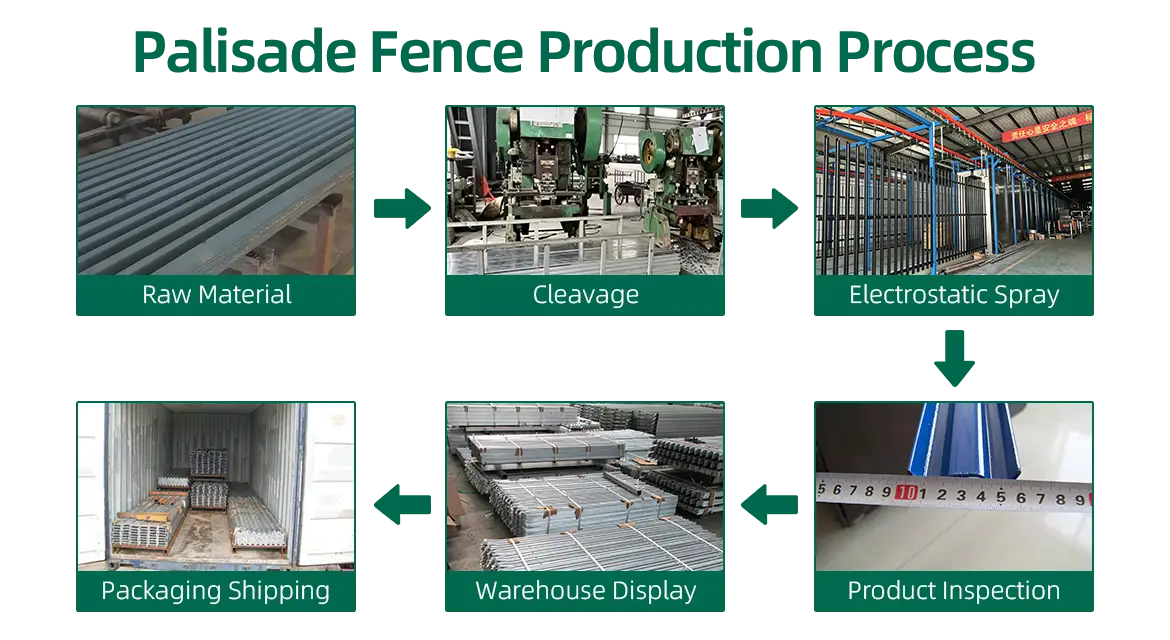
In‑house roll forming, welding, galvanizing, coating, post fabrication. Strict QC, fast lead time (15‑20 days), competitive pricing.
6. Global Security Fence Experience
Supplied power substations, industrial parks, airports, factories across UK, Australia, Germany, South Africa, Saudi Arabia, Canada and more.
📌 In short: Sharpened W/D pales + heavy angle rails + square post system + dual coating = BDFENCE, your trusted palisade fence partner.